OpenSocial Views Developer's Guide (v0.9)
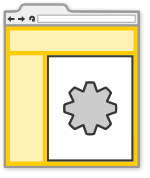
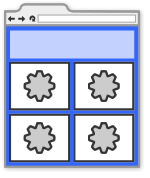
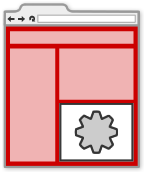
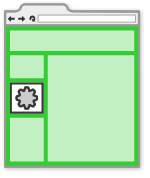
Your OpenSocial gadgets have the potential to run in many different environments. At times, they may take up most of a user's browser window, or be displayed in a narrow sidebar. They may run alone on a page, or be displayed alongside other gadgets. Sometimes gadgets can only be viewed by the person that installed them, and other times they can be accessed by anyone on the internet.
|
|
|
|
This variety is a great advantage for developers who want their applications to be seen in as many places as possible, but can be difficult to design for when all of these cases have to be covered by a single file. Thankfully, OpenSocial addresses this problem through the use of gadget views, which allow your application to deliver different experiences depending on where it is rendered.
Getting started
Require the views feature
To let your gadget take advantage of views, you'll need to require the views feature. Add <Require feature="views" /> to the ModulePrefs section of your gadget's XML:
<?xml version="1.0" encoding="UTF-8"?>
<Module>
  <ModulePrefs title="Test views gadget" author="sample.testington@example.com">
    <Require feature="views" />
  </ModulePrefs>
  <Content type="html">
    <![CDATA[
      This content section will render on all views.
    ]]>
  </Content>
</Module>
Add views to your Content section
The Content section(s) of your gadget determine what is rendered to each view. You can specify which views a Content block will render on by adding a view attribute to the Content block. The following code modifies the sample to say that the content block should render on the "default" view:
<Content type="html" view="default">
  <![CDATA\[
    This content section will render on all views.
  ]]>
</Content>
Note that adding view="default" to a Content element is a special case - "default" means that the Content block should be rendered in all views, which is the same behavior as if you had not added the view attribute at all.
By changing the value of the view attribute, you can choose where your view renders. For example, on a user's profile:
<Content type="html" view="profile">
  <![CDATA[
    This content section will render on a user's profile.
  ]]>
</Content>
or on the expanded "canvas" view:
<Content type="html" view="canvas">
  <![CDATA[
    This content section will render on a larger canvas view.
  ]]>
</Content>
Here is a list of common views supported by containers. Note that the list of the supported containers is not complete. You should consult /wiki/spaces/a/pages/526883 or developer documentation to determine what is available:
View name |
Description |
Available on... |
|---|---|---|
default |
Renders on all possible views. |
Most containers except MySpace |
all |
Renders on all possible views. |
MySpace |
profile |
Renders on a user's profile. Is visible to viewers of that profile. |
All social network-based containers |
profile.left |
Renders on the left column of a user's profile. Is visible to anyone visiting the profile. |
MySpace |
profile.right |
Renders on the right column of a user's profile. Is visible to anyone visiting the profile. |
MySpace |
home |
Renders in a small area, possibly among several other gadgets. Is only seen by the OWNER. |
iGoogle and MySpace |
canvas |
Renders on a large expanded view, filling most of the space on the screen. Is visible to anyone visiting the canvas page. |
All OpenSocial containers |
Multiple content sections
You are not limited to using a single content section for your application. By adding additional Content sections to your gadget XML spec, you can display entirely different content per view.
<?xml version="1.0" encoding="UTF-8"?>
<Module>
  <ModulePrefs title="Multiple content sections" author="sample.testington@example.com">
    <Require feature="views" />
  </ModulePrefs>
  <Content type="html" view="profile">
    <![CDATA[
      This content section will render on a smaller profile view.
    ]]>
  </Content>
  <Content type="html" view="canvas">
    <![CDATA[
      This content section will render on a larger canvas view.
    ]]>
  </Content>
</Module>
Multiple views per content section
If you have a content section that can be used in multiple views, you can specify multiple comma-separated view names in the view attribute of the Content section. The following example renders the same content on the home and profile views:
<?xml version="1.0" encoding="UTF-8"?>
<Module>
  <ModulePrefs title="Multiple views" author="sample.testington@example.com">
    <Require feature="views" />
  </ModulePrefs>
  <Content type="html" view="profile, home">
    <![CDATA[
      This content section will render on both the profile and home views.
    ]]>
  </Content>
</Module>
Redundant content sections/views
If Content sections can be repeated, and each Content section may have many views, then what happens when a view is repeated? The Gadgets Specification says:
On a <Content> block, the view names are represented as comma delimited strings which allows a particular <Content> block to be used on one or more surfaces. Surfaces with common view names have the inner XML of their <Content> blocks concatenated. Concatenation only occurs with exact matches of a view name on a <Content> block. ... Concatenation does not happen when the @href is set on a <Content> block.
So as long as each content section is type="html" and doesn't have an href attribute, Content sections will have their contents concatenated. This can be a great way to share code between multiple views, as shown in the following gadget:
<?xml version="1.0" encoding="UTF-8"?>
<Module>
  <ModulePrefs title="Concatenation of views sample" author="sample.testington@example.com">
    <Require feature="views" />
  </ModulePrefs>
  <Content type="html" view="home, profile, canvas, default">
    <![CDATA[
      <p><strong>This text shows up on all views</strong></p>
      <p>Elements in this content section will be rendered in all views, making it a good place to put JavaScript utility functions.</p>
    ]]>
  </Content>
  <Content type="html" view="home, profile">
    <![CDATA[
      <p><strong>This text only shows up on the profile and home views.</strong></p>
    ]]>
  </Content>
  <Content type="html" view="canvas">
    <![CDATA[
      <p><strong>This text only shows up on the canvas view.</strong></p>
    ]]>
  </Content>
</Module>
The previous gadget will display the following in profile and home views:
This text shows up on all views
Elements in this content section will be rendered in all views, making it a good place to put JavaScript utility functions.
This text only shows up on the profile and home views.
In the canvas view, the following is displayed:
This text shows up on all views
Elements in this content section will be rendered in all views, making it a good place to put JavaScript utility functions.
This text only shows up on the canvas view.
Subviews
OpenSocial version 0.9 introduces the concept of subviews. A subview is a user-defined label attached to a view that helps developers create multiple-page applications without resorting to JavaScript. For example, a gadget may have a content section defined for the canvas view, but also a view called canvas.help, which would contain help documentation for the gadget. The canvas.help content section is considered a subview and will not be rendered unless explicitly navigated to using a call to gadgets.view.requestNavigateTo('canvas.help').
The following example gadget demonstrates navigating between views and subviews. The profile view of this gadget contains a button which navigates to the standard canvas view. The canvas view contains a button which navigates to the page2 subview of the canvas view. When the button on the profile view is pressed, the entire gadget changes to canvas view. However, when the button on the canvas view is pressed, the gadget remains in the canvas view, but renders the content contained in the canvas.page2 Content section:
<?xml version="1.0" encoding="UTF-8"?>
<Module>
  <ModulePrefs title="Test subviews" author="api.kurrik@google.com">
    <Require feature="views" />
  </ModulePrefs>
  <Content type="html" view="profile,home">
    <![CDATA[
      <h1>Profile view</h1>
      <button onclick="gadgets.views.requestNavigateTo('canvas');">Click to go to canvas.</button>
    ]]>
  </Content>
  <Content type="html" view="canvas">
    <![CDATA[
      <h1>Canvas view</h1>
      <button onclick="gadgets.views.requestNavigateTo('canvas.page2');">Click to go to page 2.</button>
    ]]>
  </Content>
  <Content type="html" view="canvas.page2">
    <![CDATA[
      <h1>Canvas view, page 2</h1>
      <p>This is another page of content for the home view.</p>
    ]]>
  </Content>
</Module>
Using the gadgets.views JavaScript functions
The following sections illustrate some JavaScript methods which help your gadgets take advantage of the full functionality of views.
Determining available views
The gadgets.view.getSupportedViews JavaScript method gives your application the ability to query a container to find out which views it supports. The return value of this call is an array of key/value pairs where the keys are view names and the values are View objects. The following gadget demonstrates a simple way to list the supported views of the current container:
<?xml version="1.0" encoding="UTF-8"?>
<Module>
  <ModulePrefs title="getSupportedViews" author="api.kurrik@google.com">
    <Require feature="views" />
  </ModulePrefs>
  <Content type="html" view="default">
    <![CDATA[
      <h1>Available views</h1>
      <div id="view-output"></div>
      <script type="text/javascript">
        var views = gadgets.views.getSupportedViews();
        var dom = document.getElementById("view-output");
        for (var view in views) {
          if (views.hasOwnProperty(view)) {
            dom.innerHTML \+= "<div>" + view + "</div>";
         }
        }
        gadgets.log(views);
      </script>
    ]]>
  </Content>
</Module>
On iGoogle, this currently prints:
CANVAS
canvas
FULL_PAGE
HOME
home
default
Note that many of these views are aliases to the same object. For example, CANVAS, canvas, and FULL_PAGE all point to the same view.
Navigating between views
Most containers offer the users of your application buttons or links to view your gadget in a different view (usually in the form of "maximize" and "restore" buttons). However, your gadget may wish to expand or contract itself automatically in response to a user's action.
You can initiate such a switch from JavaScript by using the gadgets.view.requestNavigateTo function. In versions of OpenSocial prior to 0.9, this function needed a gadgets.view.View object as an argument, but on containers which support 0.9 and above, navigating to the desired view (for example, the canvas) is as simple as calling gadgets.views.requestNavigateTo('canvas');. If you like, you can easily create HTML links which will navigate to the desired view:
<a href="javascript:void(0);" onclick="gadgets.views.requestNavigateTo('canvas');">Go to the canvas</a>
Here is a full gadget example that displays buttons which cause the gadget to navigate between views. Note that this gadget was written for iGoogle, which uses the home and canvas views. If you were writing this gadget on orkut, you would use profile and canvas.
<?xml version="1.0" encoding="UTF-8"?>
  <Module>
    <ModulePrefs title="requestNavigateTo" author="sample.testington@example.com">
    <Require feature="views" />
  </ModulePrefs>
  <Content type="html" view="home">
    <![CDATA[
      <h1>Home view</h1>
      <button onclick="gadgets.views.requestNavigateTo('canvas');">Click to go to the canvas.</button>
    ]]>
  </Content>
  <Content type="html" view="canvas">
    <![CDATA[
      <h1>Canvas view</h1>
      <button onclick="gadgets.views.requestNavigateTo('home');">Click to go to the home view.</button>
    ]]>
  </Content>
</Module>
Passing data between views
In many cases, your application will want to change view due to direct interaction by the user. In this case, it is useful to be able to pass data from the source view to the destination view, for the purposes of saving the user's state as the gadget refreshes.
For this purpose, the gadgets.views.requestNavigateTo method accepts a second, optional parameter. Any data object passed in this parameter will be available in the destination view by calling the gadgets.view.getParams method.
The following example shows how to pass additional data to a gadgets.views.requestNavigateTo call, and how to retrieve that data in the destination view, using the gadgets.views.getParams function:
<?xml version="1.0" encoding="UTF-8"?>
<Module>
  <ModulePrefs title="requestNavigateTo with data" author="sample.testington@example.com">
    <Require feature="views" />
  </ModulePrefs>
  <Content type="html" view="home, profile">
    <![CDATA[
      <h1>Home/profile view</h1>
      <p>Type some text into the box below and click the button to send it to the canvas view.</p>
      <input type="text" id="input-data" />

      <script type="text/javascript">
        function getData() {
          return document.getElementById('input-data').value;
        };
      </script>

      <button onclick="gadgets.views.requestNavigateTo('canvas', getData());">Click to go to the canvas.</button>
    ]]>
  </Content>
  <Content type="html" view="canvas, default">
    <![CDATA[
      <h1>Canvas view</h1>
      <div id="output"></div>
      <script type="text/javascript">
        var data = gadgets.views.getParams();
        document.getElementById('output').innerHTML = "<strong>Got:</strong> " + data;
      </script>
    ]]>
  </Content>
</Module>
The requestNavigateTo call can accept a string, a number, an array, or an object as the data argument.


