OSDE Tutorial
- Mark Halvorson (Deactivated)
- Jonathan Beri (Unlicensed)
For latest documentation, please visit http://sites.google.com/site/opensocialdevenv/user-guide.
The following are deprecated.
Develop OpenSocial Applications entirely within Eclipse!
Whether you are an avid Eclipse IDE user or not, the task of building OpenSocial applications has now taken a leap forward with the introduction of the Eclipse based OpenSocial Development Environment (OSDE). With OSDE, it is now possible to build OpenSocial applications directly within Eclipse, as opposed to a live sandbox environment. This means you can easily develop OpenSocial compliant applications entirely in a stand alone manner, within the context of a modern Integrated Development Environment (IDE). OSDE provides a rich set of features that both enable and enhance OpenSocial application development for both the client within a gadget, or even on a server using the Java RESTful client libraries.
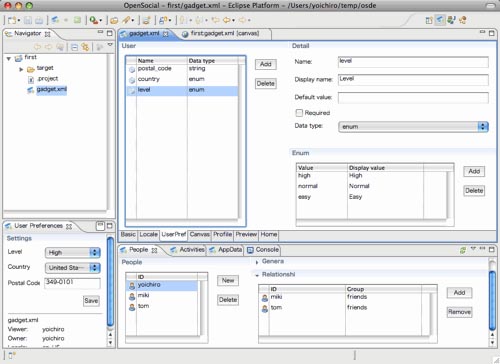
Figure 1: Introducing the OpenSocial Development Environment (OSDE)
Its features include:
- A built in Shindig server for local testing and debugging.
- An integrated database based on the Java H2 for storing and managing social data.
- Simple project and gadget code generation wizards to quickly generate your OpenSocial application projects and application code.
- A multi-paned gadget spec editor that facilitates productive gadget development.
- A new "OpenSocial" Eclipse perspective that provides enhanced editing and debugging with easy access and control of the local Shindig and social database.
- An OpenSocial REST Java client wizard that can quickly generate a new project along with sample code that uses the OpenSocial RESTful Java client library to connect to the local OpenSocial server.
- Support live testing against iGoogle server.
Note: An accompanying screencast demonstration of OSDE is available here!
Building Apps with OSDE - A Walkthrough
The simplest way to appreciate all of the features together, is to step through a walkthrough of building both a typical OpenSocial gadget application, as well as a Java client application. But before building an application, here's a quick review of how to install the OSDE plugin.
Installation
Installing the OSDE plugin into Eclipse is a simple 1 step process as it doesn't have any complicated dependencies. It requires that you have Eclipse version 3.4.1 or later ('JavaEE Developers' package is recommended) at a minimum as well a Java SE Development Kit 5.0 or higher. Installation can be done by accessing your Eclipse's 'Software Updates' and adding the new site: "http://opensocial-development-environment.googlecode.com/svn/update-site/site.xml". Once added, you can then easily install the plugin. Upon successful installation of the plugin, your Eclipse IDE requires a restart, and then you're ready to start building applications using OSDE!
Building a Simple OpenSocial App in OSDE
For this walkthrough, we'll create the typical OpenSocial "HelloWorld" app, which is a basic app that displays the viewer's friends. Before we can have a running app that displays friends however, we'll need to start the local Shindig server and populate the H2 database with some people/friends data. Fortunately this step is easily done by either using the database interface provided by OSDE to manually create new people and associate friends relations manually, or alternatively, an even easier process to get social data is to load the sample data that comes with Shindig's "SampleContainer" example app. For this walkthrough we'll simply load the sample data. Incidentally, the data need not be recreated each time this way as it is persisted for future usages.
To load the sample social data, we need to start the local shindig server. This is done by clicking the "Launch Apache Shindig server" button on Eclipse's main toolbar, or by selecting 'Launch Apache Shindig' from the OSDE menu. You will see Shindig start up in the console.
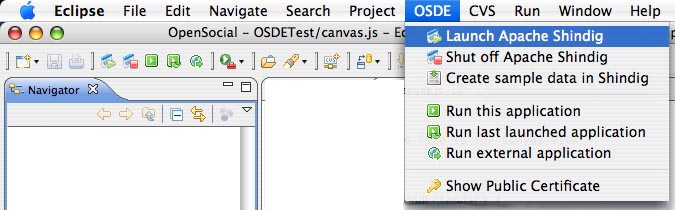
Figure 2: Launching the local Apache Shindig in Eclipse
Now that Shindig has started, we can populate the database by selecting 'Create sample data in Shindig' from the OSDE menu. Alternatively we could also use the database interface windows in the console to create custom data on the fly. This interface allows you to edit, people/relationship, activities and persistent data directly.

Figure 3: Creating sample data in the local H2 database
Now that we've setup some social data, we'll create a new OSDE project. To do this, we select 'Create new project...-> OpenSocial Project' from the main menu.
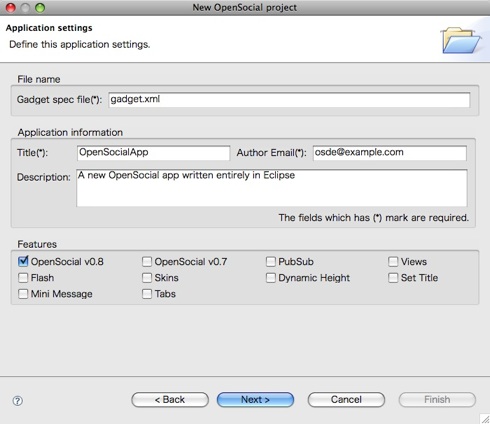
Figure 4: The OpenSocial Project Creation wizard
The first page of the OpenSocial project creator wizard allows us to define some of the core aspects of the gadget applications, such as the app title, author email as well other gadget options such as which version of OpenSocial etc.
The next step allows for the creation of 'views' of the application. These include 'canvas', 'profile', 'preview' and 'home'. For a simple app, we can create both a 'canvas' view and a 'profile' view, which is consistent with many OpenSocial containers.
For both a canvas and profile view, we can create them of type HTML, and select the option to generate JavaScript into a separate file, along with an initial 'init()' function to be called when the gadget renders.
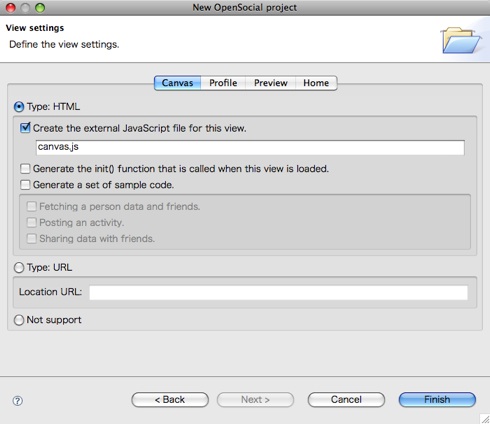
Figure 5: Creating different views in the OSDE project creation wizard
Once both canvas and profile views are created, we'll click Finish to generate the project.
As the new project appears in Eclipse, you'll notice that it as a new file for the gadget (gadget.xml) as well as a new file for each view, canvas.js and profile.js. Also, the gadget.xml file is then opened automatically and the gadget editor appears in the main window of Eclipse. You'll also notice in the File Navigator that the two views of the gadget ('canvas' and 'profile') are provided as separate JavaScript files ('canvas.js' and 'profile.js') and added to the project as well.
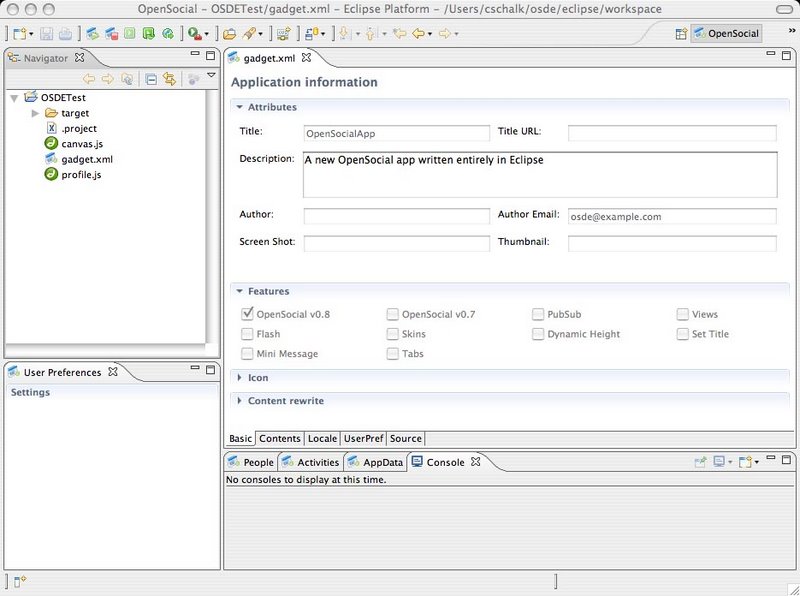
Figure 6: The productive gadget editor in OSDE
As you can see, the enhanced gadget editor allows us to easily edit the properties of the gadget spec (gadget.xml) by selecting the tabbed options at the bottom. For this example "Helloworld" gadget, we'll click the Source tab and edit the gadget spec directly.
In building this simple app, we can replace the default code in the canvas view portion of gadget spec from:
<!-- The code for Canvas view is here. -->
<div>Canvas view for foo.</div>
to
Your friends:
<div id='friends'></div>
We'll now edit the canvas.js file to show friends of the viewer. We'll replace the starter code...
function init() {
 // TODO: Write the code for initializing.
}
with the following code:
function loadFriends() {
 var req = opensocial.newDataRequest();
 req.add(req.newFetchPersonRequest(opensocial.IdSpec.PersonId.VIEWER), 'viewer');
 var viewerFriends = opensocial.newIdSpec({ "userId" : "VIEWER", "groupId" : "FRIENDS" });
 var opt_params = {};
 opt_params[opensocial.DataRequest.PeopleRequestFields.MAX] = 100;
 req.add(req.newFetchPeopleRequest(viewerFriends, opt_params), 'viewerFriends');
 req.send(onLoadFriends);
}

function onLoadFriends(data) {
 var viewer = data.get('viewer').getData();
 var viewerFriends = data.get('viewerFriends').getData();
 html = new Array();
 html.push('<ul>');
 viewerFriends.each(function(person) {
  html.push('<li>', person.getId(), '</li>');
 });
 html.push('</ul>');
 document.getElementById('friends').innerHTML = html.join('');
 gadgets.window.adjustHeight();
}

function init() {
 loadFriends();
}
Running an OpenSocial app in OSDE
Now that we've finished editing the gadget spec, and related JavaScript, we can run the application locally. This is done by right-clicking the gadget file (gadget.xml) and selecting OSDE->'Run this application.
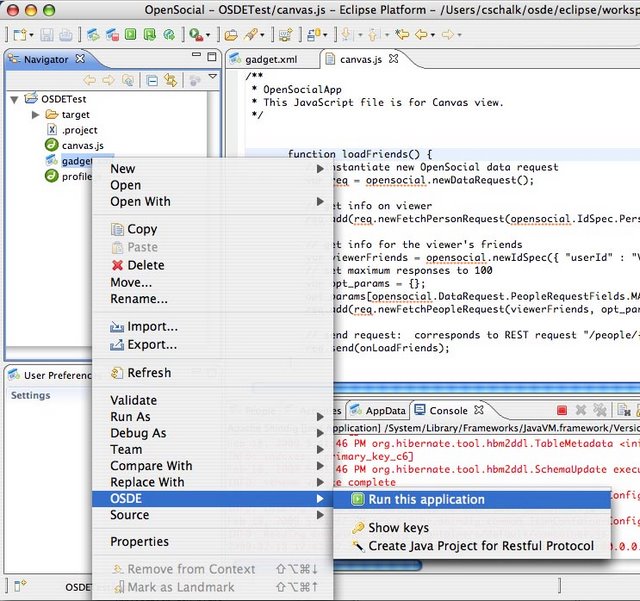
Figure 7: Running a gadget application locally using OSDE
As you select to run the application, a dialog appears prompting you to enter any runtime parameters such as the 'View', the 'Owner', the 'Viewer' as well as localization features such as Country and Language. You can also specify whether you want to run the gadget in a external browser, or in the Eclipse built-in browser.
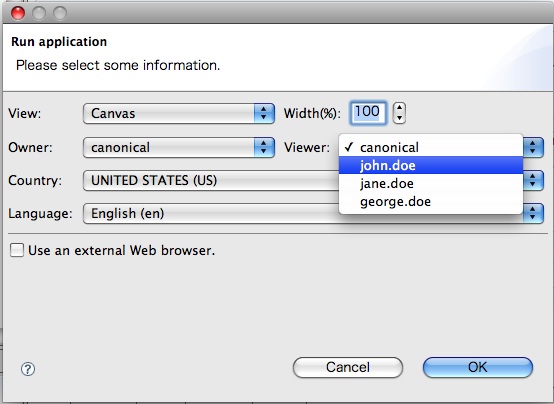
Figure 8: Specifying runtime options for a gadget in OSDE
As the application starts up, a default runtime page appears with the gadget rendered. As you can see, the results of the friends query for the user 'john.doe' is rendered in the gadget.
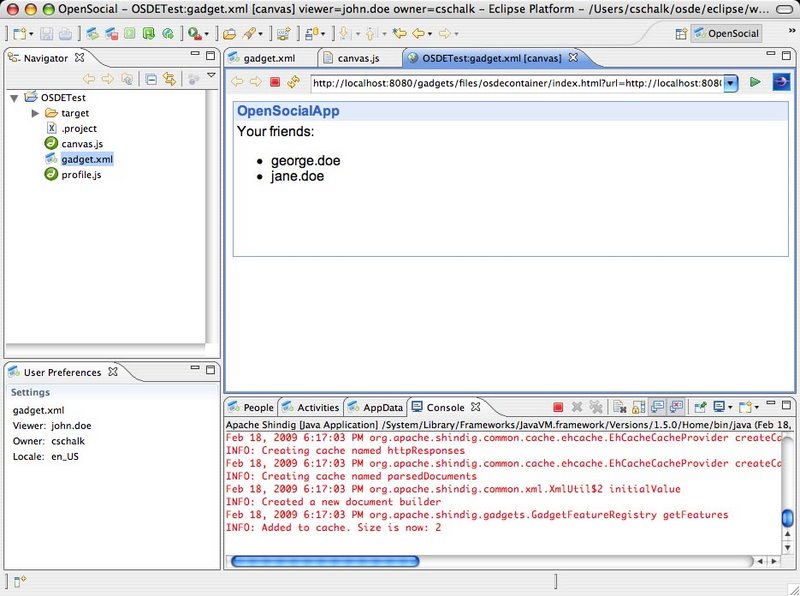
Figure 9: A running OpenSocial gadget application
Creating a Java RESTful Client Project
Now that we have create and run an OpenSocial application. We can now create a new Java client application that uses the Java client libraries. To create a out Java RESTful client project, we again right-click the gadget spec (gadget.xml) and select OSDE->Create Java Project for Restful Protocol.
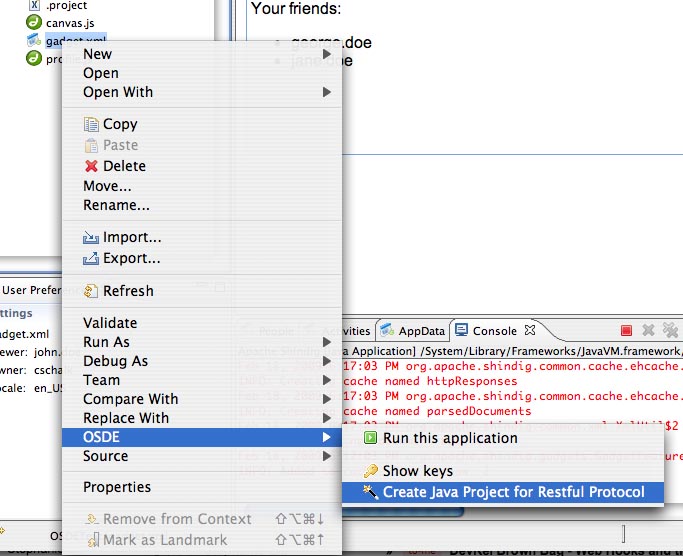
Figure 10: Creating a Java sample project that uses the RESTful protocol
The project wizard allows you to name the project and specify other settings such as the src and bin directories. Once created, the project will have a sample Java client that displays the friends of a user. To display the same friends from the sample userid 'john.doe', we can edit the Java code and specify the VIEWER_ID as "john.doe".
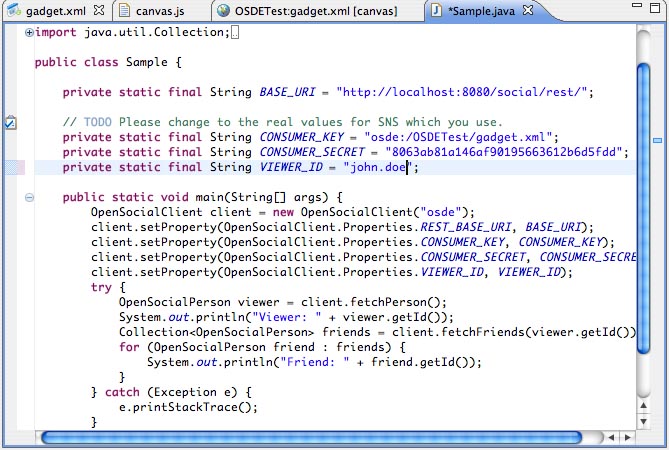
Figure 11: Changing the VIEWER_ID to 'john.doe' from the sample database.
Now that we've specified the VIEWER_ID as 'john.doe', we can run the application by right-clicking the file Sample.java, and selecting Run As-> Java Application. Note, the Shindig server should remain running for the client application to work. As the client launches, you'll notice in the console the results, which in this case are the same friends that were displayed in the previous gadget application.
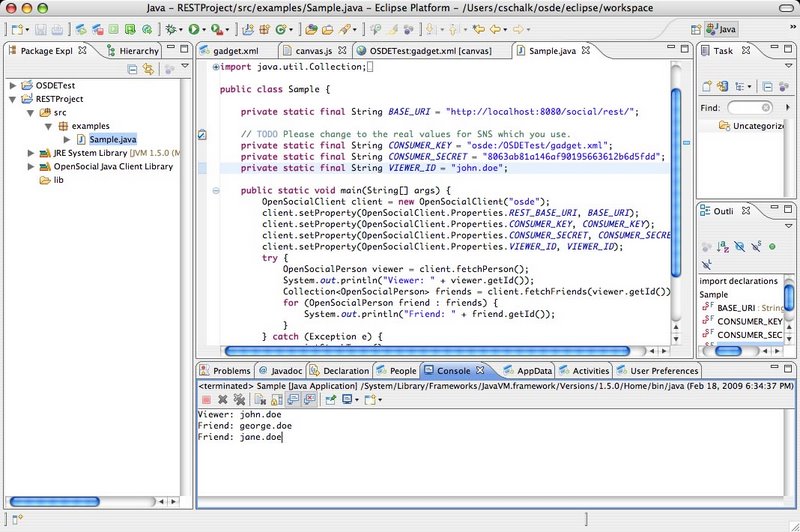
Figure 12: The Java client fetching friends using the RESTful protocol.
Summary
This concludes our brief walkthrough of the new OSDE Eclipse plugin. As you can see with this tool, it is very easy to develop and test both OpenSocial gadget applications, as well as Java client applications. As OSDE is very new, it is still in the process of evolving, so stay tuned for new features as they are developed. To follow OSDE's progress, please visit the new Google code project: http://code.google.com/p/opensocial-development-environment
Happy coding!